How to Ensure Quality Control in Surface Finishing
Introduction
Surface finishing is a manufacturing process that involves applying a coating or treatment to a material’s surface to improve its aesthetic, functional, or performance properties. The surface finishing process can involve several steps, such as cleaning, polishing, plating, and painting, depending on the desired outcome. The importance of surface finishing cannot be overstated, regardless of the industry or application. Surface finishing can improve a product’s appearance, durability, and functionality, and can even extend its lifespan. A well-executed surface finish can also enhance customer satisfaction, improve brand reputation, and increase sales.
However, to achieve a high-quality surface finish, it is essential to implement quality control measures throughout the surface finishing process. Quality control ensures consistency, accuracy, and reliability of the final product, as well as compliance with regulatory requirements. Without quality control, surface finishing defects can occur, such as uneven finish, scratches, or discoloration, which can make the product unusable or unsellable. Quality control also minimizes waste and reduces costs by catching defects early in the process, before they become more significant issues.
Different Types Of Surface Finishes
The Importance of Surface Finish Quality Control
Implementing quality control measures in surface finishing has several benefits, including:
Enhancing Customer Satisfaction
Surface finishing quality control ensures that the finished product meets the desired specifications and is consistent in quality, resulting in a high-quality product that meets or exceeds customer expectations. This can lead to increased customer satisfaction and loyalty, which can translate into repeat business and positive word-of-mouth advertising.
Reducing Cost Through Waste Reduction
Quality control measures in surface finishing can help catch defects early in the process, reducing the likelihood of producing defective products. This can minimize waste and lower production costs, as defective products may need to be scrapped or reworked, which can be costly in terms of time and resources.
Ensuring Regulatory Compliance
Surface finishing quality control is essential to meet regulatory requirements and ensure compliance with industry standards. Regulatory bodies may require specific surface finishing processes or materials to be used, and quality control measures can ensure that these requirements are met. Failure to comply with regulatory standards can result in fines, legal action, and damage to a company’s reputation.
The Surface Quality Control Process
To ensure high-quality surface finishing, it is essential to implement a comprehensive quality control process. This process typically involves several steps, including:
Initial Inspection of Raw Materials
The first step in the surface finishing quality control process is inspecting the raw materials before they are processed. This includes checking for any defects or inconsistencies in the material, such as cracks, dents, or discoloration. Any defects found during this stage should be addressed before starting the surface finishing process to prevent them from becoming more significant issues.
In-Process Inspection
During the surface finishing process, quality control measures should be in place to ensure that each step is performed correctly and that the finished product meets the desired specifications. In-process inspections may include checking the surface for defects, measuring the thickness of the coating or treatment, and verifying that the product’s surface is smooth and even.
Final Inspection
After the surface finishing process is complete, a final inspection should be performed to ensure that the finished product meets the desired specifications and complies with regulatory requirements. This may include checking for defects, verifying the surface finish’s thickness and adhesion, and ensuring that the product’s appearance meets the desired standards.
Documentation and Record-Keeping
Throughout the surface finishing quality control process, documentation and record-keeping are essential to ensure that the finished product meets the desired specifications and complies with regulatory requirements. This includes documenting the raw materials’ inspection results, recording the steps performed during thesurface finishing process, and maintaining records of the final inspection and test results. These records can be used to identify any issues that arise during the surface finishing process, track the product’s history, and demonstrate compliance with regulatory requirements.
Common Surface Finishing Defects and Their Causes
Despite implementing quality control measures, surface finishing defects can still occur. It is essential to identify and understand these defects’ causes to prevent them from happening in the future. Some of the most common surface finishing defects include:
1. Uneven Finish
Uneven finish is when the surface finish is not consistent across the product’s surface. This defect can occur due to several reasons, such as improper cleaning of the surface, poor application technique, or uneven coating thickness.
To prevent uneven finish defects, quality control measures such as proper surface preparation, use of correct application techniques and equipment, and regular inspection can be implemented.
2. Discoloration
Discoloration is when the surface finish has an uneven or incorrect color. This defect can occur due to several reasons, such as the use of incorrect materials or pigments, incorrect curing times, or uneven application of the coating.
To prevent discoloration defects, quality control measures such as using high-quality materials and pigments, following the correct curing times and temperatures, and applying the coating evenly can be implemented.
3. Scratches
Scratches are when the surface finish has visible scratches or marks on it. This defect can occur due to several reasons, such as improper handling or transport of the product, use of abrasive cleaning materials, or poor application techniques.
To prevent scratches defects, quality control measures such as proper handling and transportation of the product, using non-abrasive cleaning materials, and implementing proper application techniques can be implemented.
4. Adhesion Failure
Adhesion failure is when the surface finish does not adhere to the product’s surface, resulting in peeling or flaking. This defect can occur due to several reasons, such as surface contamination, improper surface preparation, or poor application techniques.
To prevent adhesion failure defects, quality control measures such as proper surface cleaning and preparation, use of appropriate primers or adhesion promoters, and following correct application techniques can be implemented.
5. Orange Peel
Orange peel is when the surface finish has a texture resembling the skin of an orange. This defect can occur due to several reasons, such as incorrect viscosity of the coating material, improper application technique, or incorrect drying time.
To prevent orange peel defects, quality control measures such as using the correct viscosity of the coating material, following the correct application technique, and allowing sufficient drying time can be implemented.
Options For Metal Part Surface Finishing
Techniques for Surface Finish Quality Control
To ensure high-quality surface finishing, several techniques can be used for quality control purposes. These techniques can detect defects, measure thickness, and verify compliance with regulatory requirements. Some of the most commonly used techniques for surface finishing quality control include:
1. Visual Inspection
Visual inspection is the most basic and widely used technique for surface finishing quality control. It involves examining the finished product’s surface visually to detect any defects, such as scratches, uneven finish, or discoloration. Visual inspection can be performed during the in-process inspection or final inspection stages of the surface finishing process.
2. Spectrophotometry
Spectrophotometry is a technique used to measure the color and appearance of the surface finish. This technique involves using a spectrophotometer to measure the amount of light absorbed or reflected by the surface finish. Spectrophotometry can detect color differences that may not be visible to the naked eye and can help ensure consistency in the color and appearance of the finished product.
3. X-Ray Fluorescence
X-ray fluorescence (XRF) is a technique used to measure the thickness of the surface finish or coating. This technique involves using an X-ray gun to emit X-rays onto the surface finish, which are then absorbed and re-emitted as fluorescent radiation. The thickness of the surface finish can be calculated based on the intensity of the fluorescent radiation.
4. Fourier Transform Infrared Spectroscopy (FTIR)
Fourier Transform Infrared Spectroscopy (FTIR) is a technique used to identify the chemical composition of the surface finish. This technique involves using an FTIR spectrometer to analyze the surface finish’s infrared absorption spectrum. By comparing the absorption spectrum to a reference library, the chemical composition of the surface finish can be identified.
5. Scanning Electron Microscopy (SEM)
Scanning Electron Microscopy (SEM) is a technique used to examine the surface finish’s microstructure and surface morphology. This technique involves using an electron beam to scan the surface finish’s surface, producing high-resolution images that can be used to detect defects or inconsistencies in the surface finish.
Surface Finish Measurement
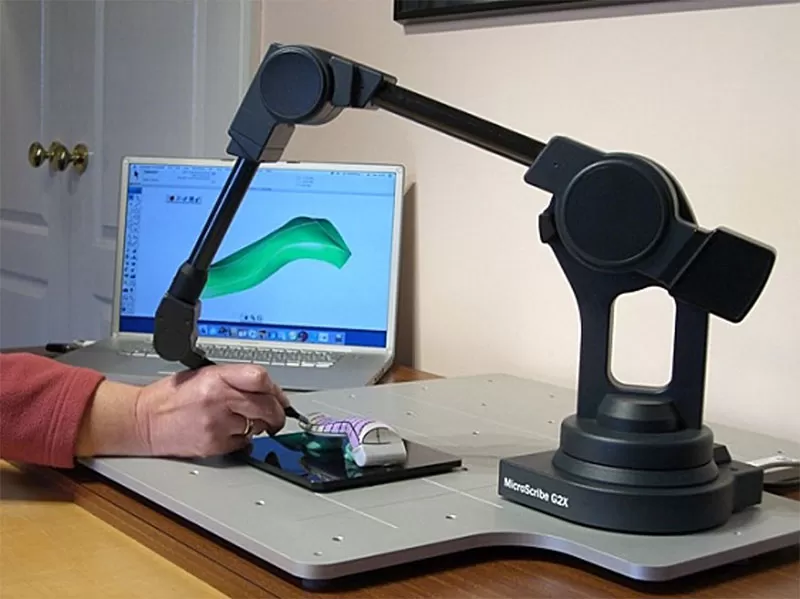
Surface finish measurement is a critical aspect of surface finishing quality control. It involves measuring the surface finish’s roughness, texture, and other physical characteristics to ensure that it meets the desired specifications and complies with regulatory requirements. Some of the most important aspects of surface finish measurement include:
The Importance of Surface Finish Measurement
Surface finish measurement is essential to ensure that the finished product meets the desired specifications and is consistent in quality. It helps to detect defects, verify compliance with regulatory requirements, and ensure that the product’s physical characteristics are within the specified tolerances. Surface finish measurement also helps to identify areas for improvement and optimization in the surface finishing process.
Commonly Used Surface Finish Measurement Techniques
Several techniques can be used to measure surface finish, including:
- Contact Profilometry: This technique involves using a stylus to measure the surface finish’s profile and roughness.
- Optical Profilometry: This technique involves using light to measure the surface finish’s profile and roughness.
- Laser Scanning: This technique involves using a laser to measure the surface finish’s profile and roughness.
- Interferometry: This technique involves using light interference to measure the surface finish’s profile and roughness.
- Atomic Force Microscopy (AFM): This technique involves using a scanning probe to measure the surface finish’s profile and roughness at a nanoscale level.
How to Interpret Surface Finish Measurement Data
Interpreting surface finish measurement data requires an understanding of themeasurement technique used and the desired specifications for the finished product. Surface finish measurements are typically expressed in units such as Ra, Rz, or Rq, which represent different aspects of the surface finish’s roughness and texture.
For example, Ra represents the average roughness of the surface finish, while Rz represents the maximum peak-to-valley height of the surface finish. The desired specifications for the finished product will define the acceptable ranges for these measurements.
When interpreting surface finish measurement data, it is essential to compare the actual measurements to the desired specifications and determine if they fall within the acceptable ranges. If the measurements are outside of the acceptable ranges, further investigation may be required to identify the cause of the issue and implement corrective actions.
Tips for Effective Finishing Quality Control
To ensure effective surface finishing quality control, businesses can implement several measures, including:
1. Importance of Training Employees
Training employees on quality control practices and procedures is essential to ensure that they understand the importance of quality control and have the necessary skills and knowledge to implement it effectively. Proper training can help reduce the risk of errors, defects, and non-compliance with regulatory requirements.
2. Regular Equipment Maintenance
Regular maintenance of equipment used in the surface finishing process is essential to ensure that it is functioning correctly and producing consistent results. Equipment that is not well-maintained can lead to defects, inconsistencies, and non-compliance with regulatory requirements.
3. Communication and Collaboration between Departments
Effective communication and collaboration between departments involved in the surface finishing process, such as production, quality control, and engineering, are essential to ensure that surface finished products meet the desired specifications and comply with regulatory requirements. Regular meetings and feedback sessions can help identify issues and implement corrective actions.
4. Continuous Improvement and Feedback
Implementing continuous improvement processes and soliciting feedback from employees, customers, and suppliers can help identify areas for improvement in the surface finishing process. Regular review and analysis of quality control data can also help identify trends and areas for improvement.
Conclusion
Effective surface finishing quality control is essential to ensure that surface finished products meet the desired specifications, comply with regulatory requirements, and satisfy customer expectations. By implementing quality control measures, businesses can minimize the risk of defects, improve consistency in quality, and enhance customer satisfaction and loyalty.
