Common Methods for Your Rapid Prototype Coloring
Overview of Rapid Prototype Coloring
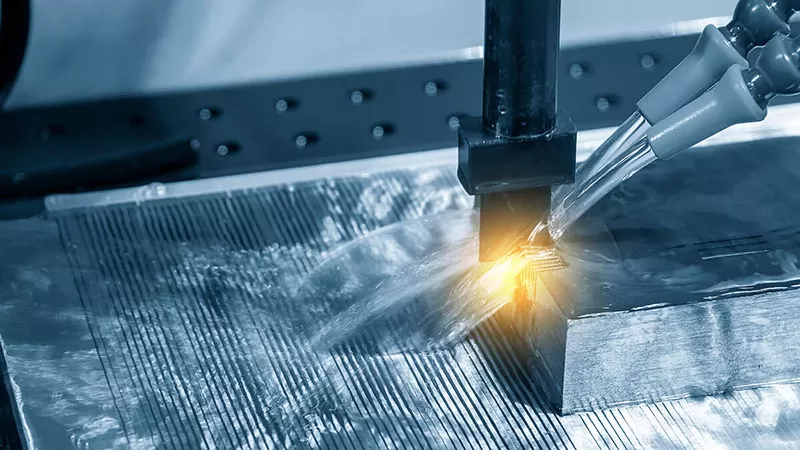
Rapid prototyping is the process of creating a physical model of a product using CNC Machining, 3D printing technology, or other similar techniques. This allows engineers and designers to test and refine their designs quickly and efficiently before committing to expensive production runs. While the primary focus of rapid prototyping is often on functionality, it is also important to consider the aesthetic appeal of the prototype surface finishing. Through rapid prototype coloring, you can better visualize the final product and make more informed decisions about the design. In addition to improving the visual appeal of your prototype, coloring can also provide additional benefits such as improved durability, corrosion resistance, and enhanced branding. By investing in the right coloring method for your rapid prototype, you can better showcase your design and make a lasting impression on potential customers or investors.
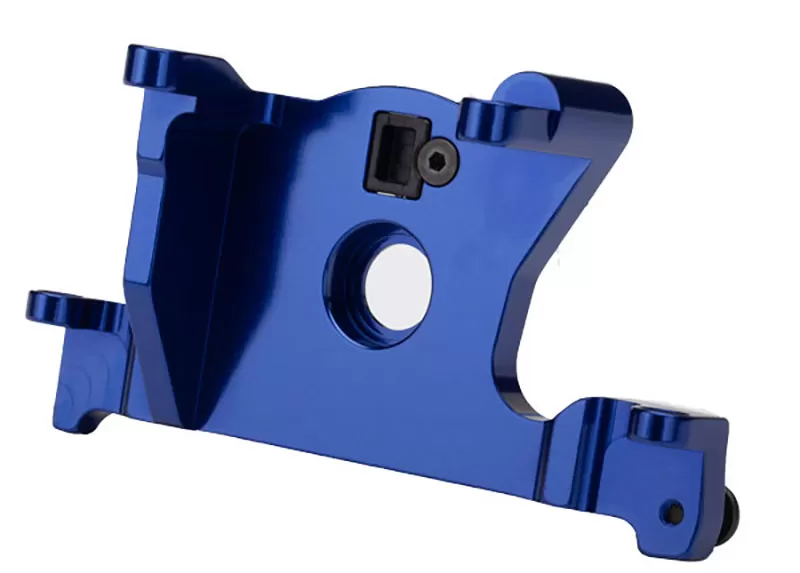
Spray Painting For Customized Parts
Method 1: Painting
Painting is one of the most common and straightforward methods for rapid prototype coloring. It offers a wide range of color options and can be easily customized to suit your specific needs. Here is a step-by-step guide to the painting process:
Materials Needed:
- Spray paint or paintbrush and paint
- Sandpaper (various grits)
- Primer (optional)
- Masking tape
- Gloves and safety glasses
Painting Process:
- Prepare the Surface: Before painting, it is important to prepare the surface of your rapid prototype by sanding it down with fine-grit sandpaper. This will create a smooth surface that the paint can adhere to. If your prototype has any imperfections or rough spots, use coarser grit sandpaper to smooth them out.
- Apply Primer (Optional): Applying a primer can help improve the adhesion of the paint and provide a more uniform finish. If you choose to use a primer, follow the manufacturer’s instructions and allow it to dry completely before painting.
- Apply Paint: You can apply the paint using either a paintbrush or spray paint. If using spray paint, be sure to use it in a well-ventilated area and wear gloves and safety glasses to protect yourself. Apply thin and even coats, allowing each coat to dry completely before applying the next one.
- Repeat: Depending on the desired finish and color, you may need to apply several coats of paint. Be patient and allow each coat to dry completely before applying the next one.
Tips for Achieving a Smooth Finish:
- Sand the surface of the prototype before painting to ensure a smooth finish.
- Use a primer to improve the adhesion of the paint and provide a more uniform finish.
- Apply thin and even coats of paint to prevent drips and bubbles.
- Allow each coat to dry completely before applying the next one.
- Use masking tape to protect any areas that you do not want to paint.
Types of Paint Suitable for Rapid Prototyping:
There are several types of paint suitable for rapid prototyping, including:
- Acrylic paint: A water-based paint that dries quickly and is easy to clean up.
- Enamel paint: A solvent-based paint that dries to a hard, glossy finish.
- Epoxy paint: A two-part paint that creates a durable and long-lasting finish.
- Spray paint: A convenient and easy-to-use option that provides a smooth and even finish.
When choosing a paint, consider the properties of the material you are painting and the desired finish. Some paints may not adhere well to certain materials, so be sure to choose a paint that is appropriate for your specific application.
Method 2: Dyeing
Dyeing is another popular method for coloring your rapid prototypes. Unlike painting, which applies a layer of color on top of the surface, dyeing penetrates the material and colors it from within. This can result in a more vibrant and long-lasting color. Below is a detailed guide to dyeing process:
Materials Needed:
- Fabric dye or wood dye (depending on the material of your prototype)
- Large plastic container or pot
- Water
- Salt or vinegar (depending on the type of dye)
- Gloves and safety glasses
Dyeing Process:
- Prepare the Dye: Follow the manufacturer’s instructions to prepare the dye solution. Depending on the type of dye you are using, you may need to add salt or vinegar to the mixture.
- Prepare the Prototype: Clean the surface of the prototype to remove any dirt or debris. If the material of your prototype is porous, soak it in water to ensure that it absorbs the dye evenly.
- Apply the Dye: Immerse the prototype in the dye solution, making sure that it is fully submerged. Use a stirring stick to agitate the solution and ensure that the dye is evenly distributed.
- Let the Dye Set: The dyeing time will depend on the type of dye and the desired color intensity. Check the manufacturer’s instructions for recommended dyeing times.
- Rinse and Dry: Once the dyeing time is complete, remove the prototype from the dye solution and rinse it thoroughly with cold water. Continue rinsing until the water runs clear. Allow the prototype to air dry completely.
Tips for Achieving an Even Color Distribution:
- Soak the prototype in water before dyeing to ensure even absorption of the dye.
- Stir the dye solution regularly to ensure even distribution of the dye.
- Use enough dye solution to fully immerse the prototype and ensure even coloring.
- Check the manufacturer’s instructions for recommended dyeing times to avoid over- or under-dyeing.
Types of Dyes Suitable for Rapid Prototyping:
The type of dye you choose will depend on the material of your prototype. Here are some common types of dyes suitable for rapid prototyping:
- Fabric dye: Suitable for dyeing textiles, such as cotton, silk, and wool.
- Wood dye: Suitable for dyeing wood and other porous materials.
- Plastic dye: Suitable for dyeing plastic materials, such as nylon and polyester.
When choosing a dye, consider the material of your prototype and the desired color. Some dyes may not work well with certain materials, so be sure to choose a dye that is appropriate for your specific application.
Ral Powder Coating Colors
Method 3: Powder Coating
Powder coating is a durable and long-lasting method for your rapid prototype coloring. It involves applying a layer of dry powder to the surface of the prototype and then baking it in an oven to create a hard, durable finish.
Materials Needed:
- Powder coating gun
- Powder coating powder
- Compressed air
- Oven
- Gloves and safety glasses
Powder Coating Process:
- Prepare the Prototype: Clean the surface of the prototype to remove any dirt or debris. If the prototype has any imperfections, use a sandblaster to smooth out the surface.
- Apply the Powder: Load the powder coating gun with the desired color powder. Apply a thin and even layer of powder to the surface of the prototype, using compressed air to ensure that the powder is evenly distributed.
- Bake the Prototype: Preheat the oven to the recommended temperature for the powder coating powder. Place the prototype in the oven and bake it for the recommended time, usually between 20-30 minutes.
- Allow the Prototype to Cool: Once the baking time is complete, remove the prototype from the oven and allow it to cool completely.
Tips for Achieving a Durable Finish:
- Clean the surface of the prototype thoroughly before powder coating to ensure that the powder adheres properly.
- Apply a thin and even layer of powder to ensure that it bakes evenly.
- Follow the manufacturer’s instructions for baking time and temperature to ensure a durable finish.
- Allow the prototype to cool completely before handling it.
Colors Available for Powder Coating:
Powder coating is available in a wide range of colors, including metallic finishes, matte finishes, and glossy finishes. Some powder coating manufacturers can even create custom colors, allowing you to match the color of your prototype to your branding or design.
When choosing a powder coating color, consider the material of your prototype and the desired finish. Some colors may not adhere well to certain materials, so be sure to choose a powder coating that is appropriate for your specific application.
Anodized Aluminum Parts In Different Colors
Method 4: Anodizing Rapid Prototype Coloring
Anodizing is a process that creates a protective layer of oxide on the surface of a metal object. It can also be used to color the surface of the metal, creating a durable and long-lasting finish.
Materials Needed:
- Anodizing solution
- Power supply
- Titanium or aluminum rack
- Gloves and safety glasses
Anodizing Processing Steps:
- Prepare the Prototype: Clean the surface of the prototype to remove any dirt or debris. If the prototype has any imperfections, use a sandblaster to smooth out the surface.
- Prepare the Anodizing Solution: Follow the manufacturer’s instructions to prepare the anodizing solution.
- Set Up the Power Supply: Connect the power supply to the titanium or aluminum rack, which will hold the prototype during the anodizing process.
- Anodize the Prototype: Immerse the prototype in the anodizing solution and connect it to the power supply. The current will cause the oxide layer to form on the surface of the metal, creating the desired color.
- Rinse and Seal: Once the anodizing process is complete, rinse the prototype thoroughly with water. Apply a sealing solution to the surface of the metal to protect the finish.
Tips for Achieving a Consistent Color:
- Use a titanium or aluminum rack to ensure that the anodizing solution is evenly distributed over the surface of the prototype.
- Follow the manufacturer’s instructions for the anodizing solution and the power supply to achieve the desired color.
- Rinse the prototype thoroughly after anodizing to remove any excess solution.
Types of Anodizing Suitable for Prototyping:
There are several types of anodizing suitable for rapid prototye coloring, including:
- Type I: Chromic Acid Anodizing: Suitable for aluminum and titanium alloys, this type of anodizing creates a thin and porous oxide layer that provides good corrosion resistance.
- Type II: Sulfuric Acid Anodizing: Suitable for aluminum alloys, this type of anodizing creates a thicker and more durable oxide layer that can be dyed a variety of colors.
- Type III: Hardcoat Anodizing: Suitable for aluminum alloys, this type of anodizing creates a thicker and harder oxide layer that provides excellent wear and corrosion resistance.
When choosing an anodizing type, consider the material of your prototype and the desired finish. Some anodizing types may not be suitable for certain materials, so be sure to choose an anodizing process that is appropriate for your specific application.
Method 5: Hydrographics
Hydrographics, also known as water transfer printing, is a technique that allows you to apply a pattern or design to the surface of your rapid prototype. It involves transferring a printed design onto a water-soluble film, which is then floated on the surface of a tank of water. The prototype is then dipped into the water, allowing the film to wrap around the surface of the prototype and transfer the design.
Materials Needed:
- Hydrographics film
- Tank of water
- Activator spray
- Gloves and safety glasses
Hydrographics Process:
- Prepare the Prototype: Clean the surface of the prototype to remove any dirt or debris. If the prototype has any imperfections, use a sandblaster to smooth out the surface.
- Prepare the Hydrographics Film: Choose a hydrographics film with the desired pattern or design. Cut the film to the appropriate size and place it on the surface of the water.
- Apply the Activator Spray: Spray the activator spray onto the surface of the film. This will dissolve the film and activate the ink, allowing it to transfer onto the surface of the prototype.
- Dip the Prototype: Dip the prototype into the water, allowing the film to wrap around the surface of the prototype and transfer the design.
- Rinse and Dry: Once the transfer is complete, remove the prototype from the water and rinse it thoroughly with cold water. Allow the prototype to air dry completely.
Tips for Achieving a Unique Pattern or Design:
- Choose a hydrographics film with a unique pattern or design that complements your prototype.
- Experiment with different activator sprays to achieve different effects, such as a matte or glossy finish.
- Use masking tape to create a custom design or pattern on the surface of the prototype before dipping it into the water.
Patterns Available for Hydrographics:
Hydrographics films are available in a wide range of patterns and designs, including:
- Camouflage
- Carbon fiber
- Wood grain
- Animal prints
- Geometric patterns
When choosing a hydrographics pattern, consider the design and style of your prototype. Some patterns may not work well with certain materials, so be sure to choose a hydrographics film that is appropriate for your specific application.
Method 6: Plasma Coating
Plasma coating is a process that uses a high-energy plasma beam to deposit a thin film of material onto the surface of a rapid prototype coloring. It can be used to enhance the appearance and functionality of a prototype, providing a durable and long-lasting finish.
Materials Needed:
- Plasma coating system
- Coating material
- Gloves and safety glasses
Plasma Coating Process:
- Prepare the Prototype: Clean the surface of the prototype to remove any dirt or debris. If the prototype has any imperfections, use a sandblaster to smooth out the surface.
- Load the Coating Material: Load the plasma coating system with the desired coating material. The material can be in the form of a solid, liquid, or gas.
- Apply the Plasma Beam: Turn on the plasma coating system and direct the plasma beam onto the surface of the prototype. The high-energy beam will vaporize the coating material and deposit it onto the surface of the prototype.
- Allow the Coating to Cool: Once the coating process is complete, allow the prototype to cool completely before handling it.
Tips for Achieving a Uniform Coating:
- Ensure that the surface of the prototype is clean and free of any contaminants before applying the plasma coating.
- Adjust the plasma beam to ensure that it is evenly distributed over the surface of the prototype.
- Use a uniform coating material to ensure that the coating is consistent and uniform.
Colors Available for Plasma Coating:
Plasma coating is available in a range of colors, including metallic finishes, matte finishes, and glossy finishes. Some plasma coating materials can even create custom colors, allowing you to match the color of your prototype to your branding or design.
When choosing a plasma coating color, consider the material of your prototype and the desired finish. Some colors may not adhere well to certain materials, so be sure to choose a coating material that is appropriate for your specific application.
Gold Electroplating Finish
Method 7: Electroplating for Rapid Prototype Coloring
Electroplating is a process that uses an electrical current to deposit a thin layer of metal onto the surface of a rapid prototype. It can be used to provide a decorative or functional finish to the prototype, enhancing its appearance and durability. Here is a step-by-step guide to the electroplating process:
Materials Needed:
- Electroplating solution
- Power supply
- Electroplating rack
- Gloves and safety glasses
Electroplating Process:
- Prepare the Prototype: Clean the surface of the prototype to remove any dirt or debris. If the prototype has any imperfections, use a sandblaster to smooth out the surface.
- Prepare the Electroplating Solution: Follow the manufacturer’s instructions to prepare the electroplating solution.
- Set Up the Power Supply: Connect the power supply to the electroplating rack, which will hold the prototype during the electroplating process.
- Electroplate the Prototype: Immerse the prototype in the electroplating solution and connect it to the power supply. The current will cause the metal ions in the solution to bond to the surface of the prototype, creating a thin layer of metal.
- Rinse and Dry: Once the electroplating process is complete, rinse the prototype thoroughly with water. Dry the prototype completely before handling it.
Tips for Achieving a Smooth and Consistent Finish:
- Ensure that the surface of the prototype is clean and free of any contaminants before electroplating.
- Use a uniform electroplating solution to ensure that the coating is consistent and uniform.
- Adjust the power supply to ensure that the electroplating is even and smooth.
Types of Electroplating Suitable for Rapid Prototyping:
There are several types of electroplating suitable for rapid prototyping, including:
- Copper plating: Provides a decorative finish and can also be used to improve the conductivity of the prototype.
- Nickel plating: Provides a durable and corrosion-resistant finish.
- Gold plating: Provides a decorative and corrosion-resistant finish.
When choosing an electroplating type, consider the material of your prototype and the desired finish. Some electroplating types may not be suitable for certain materials, so be sure to choose an electroplating process that is appropriate for your specific application.
Method 9: Vinyl Wrapping
Vinyl wrapping is a process that involves applying a thin vinyl film to the surface of a rapid prototype. It can be used to provide a decorative or protective finish to the prototype, enhancing its appearance and durability.
Materials Needed:
- Vinyl wrap
- Squeegee
- Heat gun
- Knife
- Gloves and safety glasses
Vinyl Wrapping Process:
- Prepare the Prototype: Clean the surface of the prototype to remove any dirt or debris. If the prototype has any imperfections, use a sandblaster to smooth out the surface.
- Cut the Vinyl Wrap: Cut the vinyl wrap to the appropriate size, leaving a small amount of excess material around the edges of the prototype.
- Apply the Vinyl Wrap: Peel the backing off the vinyl wrap and place it onto the surface of the prototype. Use a squeegee to smooth out any air bubbles and ensure that the vinyl wrap is evenly applied.
- Heat the Vinyl Wrap: Use a heat gun to heat the vinyl wrap, allowing it to conform to the surface of the prototype. Be careful not to overheat the vinyl wrap, as this can cause it to shrink or warp.
- Trim the Excess Material: Use a knife to trim away the excess material around the edges of the prototype.
Tips for Achieving a Professional-Looking Finish:
- Ensure that the surface of the prototype is clean and free of any contaminants before applying the vinyl wrap.
- Use a heat gun to apply heat evenly to the vinyl wrap, allowing it to conform to the surface of the prototype.
- Take your time and be patient, as a rushed vinyl wrapping job can result in a sloppy and unprofessional-looking finish.
Patterns and Colors Available for Vinyl Wrapping:
Vinyl wrap is available in a wide range of patterns and colors, including:
- Matte finishes
- Glossy finishes
- Metallic finishes
- Carbon fiber
- Camouflage
- Animal prints
When choosing a vinyl wrap pattern or color, consider the design and style of your prototype. Some patterns and colors may not work well with certain materials, so be sure to choose a vinyl wrap that is appropriate for your specific application.